Want to import data from CSV file to Azure?
Try Withdata FileToDB, a desktop CSV to Azure converter for Windows, MacOS, and Linux, Convert CSV to Azure, Easy and Fast.
- Can run in GUI mode, Step by Step, just a few mouse clicks.
- Can run in Command line, for Scheduled Tasks and Streams.
- Convert locally and privately, avoid uploading large or private CSV file(s) to online services.

Import data from CSV file to Azure in 4 steps
Choose CSV file -> Set Azure table -> Preview -> Import
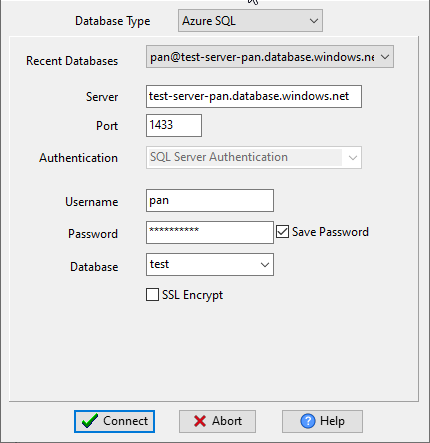
Choose Azure and logon.
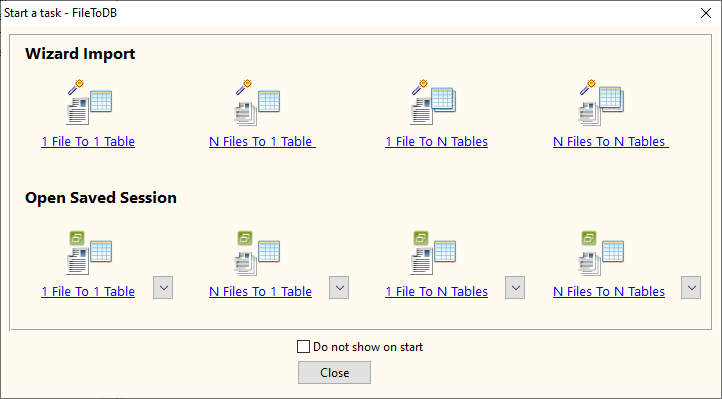
Click “Wizard – 1 File To 1 Table” at task dialog.
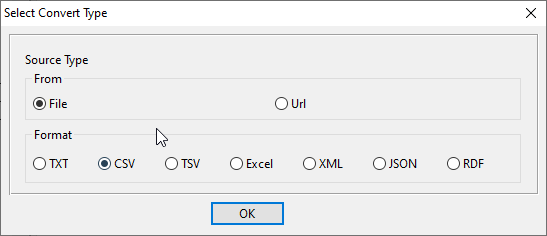
Select the “CSV” file type.
then show the wizard.
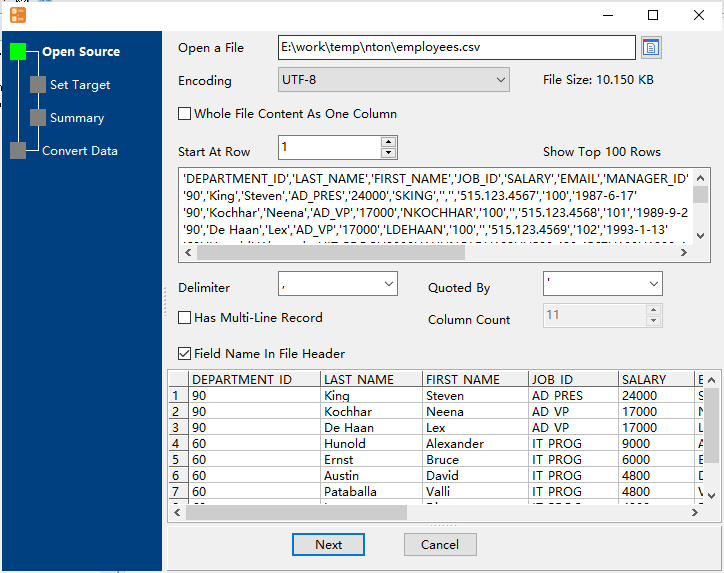
Step #1. Choose a CSV file.
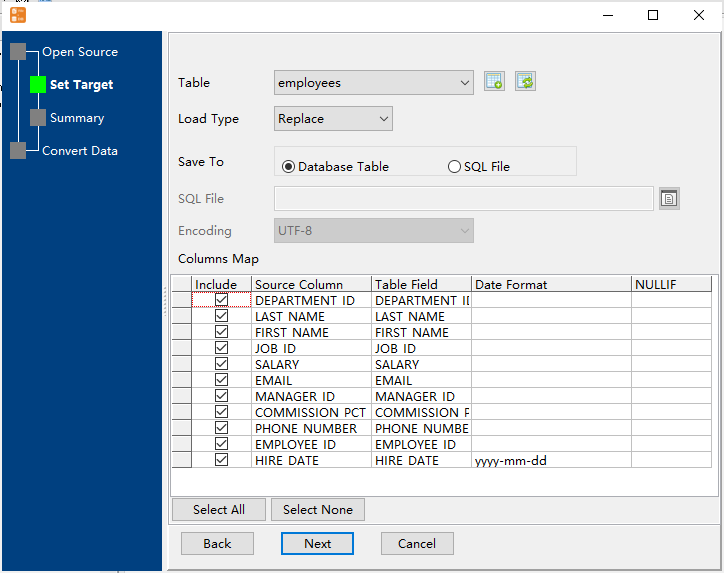
Step #2. Choose a Azure table and config fields.
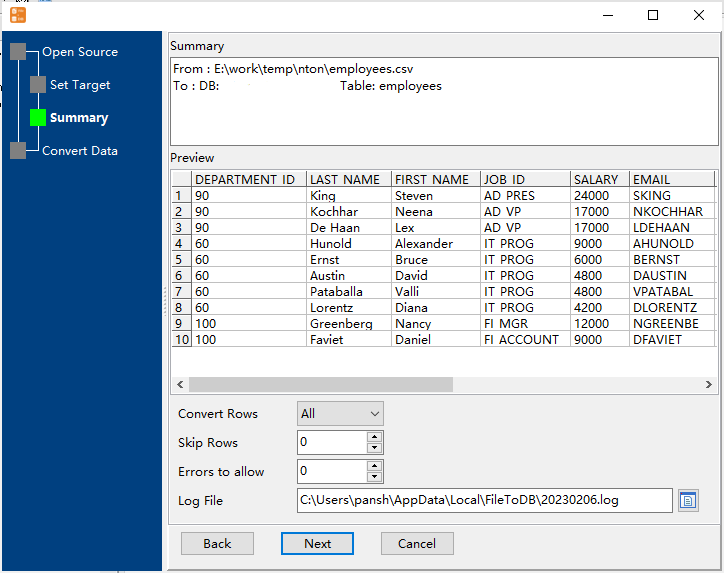
Step #3. Preview data and config “Convert Rows”.
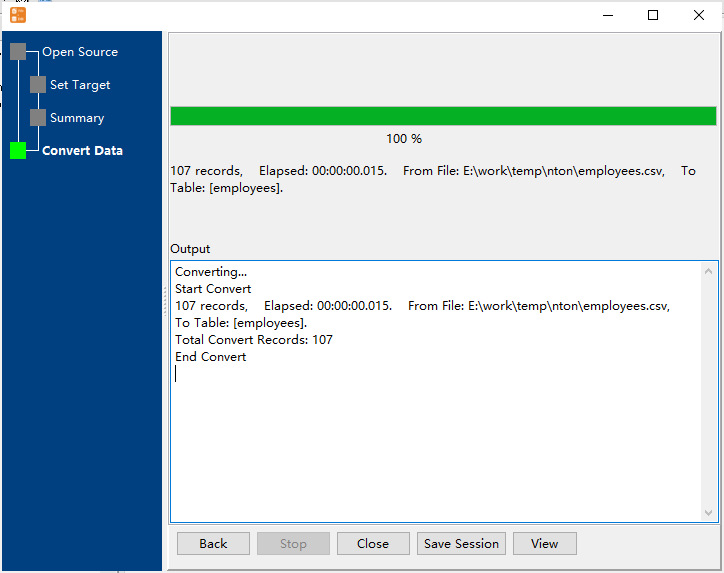
Step #4. Import CSV to Azure.
Import CSV to Azure in command line
Save “CSV to Azure” session, then you can:
- Import CSV to Azure in Windows command line.
- Import CSV to Azure in Linux command line.
- Import CSV to Azure in macOS command line.
Set scheduled tasks for importing CSV to Azure
You can schedule and automate this converting task by:
- Save session and create .bat (Windows) or .sh (Linux/macOS) file for “CSV to Azure” conversion.
- Set scheduled task for “CSV to Azure” conversion.
FAQ
More about Withdata FileToDB – CSV to Azure converter
Download Withdata FileToDB